I am a mutiple part article
Recently I had the chance to work with the latest version of Joomla in a multi-language project. Having used a custom made language tool before, I felt Joomla’s built in design was poor for handling content editing for multiple languages. Fortunately, however, the solution was simple. The solution is to modify the way the articles work so that we can have extra content fields, each corresponding to a different language. While I found instructions on modifying Joomla 1.5, there was little to no documentation on modifying 1.7 this way. Fortunatelly however, at least half of the process is very similar, furthermore, Joomla 1.7’s core code is organized enough that making any modifications feels more natural than it tends to be with other software. So this is how I got 1.7 to allow me to have extra fields. This will surely make Joomla a lot more flexible
So in this tutorial I will cover how to add new fields to your articles, how to link them to the database, and how to modify the output of your modules and components so that you can achieve the results desired.
Adding a custom field
- 1. Go to administrator\components\com_content\models\forms\article.xml
- In it you’ll find a list of field tags in xml. These are the fields that make the forms you see when you edit an article.
-
1
2
3
4
5<field name="articletext" type="editor" class="inputbox"
label="COM_CONTENT_FIELD_ARTICLETEXT_LABEL" description="COM_CONTENT_FIELD_ARTICLETEXT_DESC"
filter="ContentHelper::filterText" buttons="true" /> - You can copy and paste that, but make sure to change the name attribute to something else, preferably something which describes your textbox. Maybe you want to use it to be the text for a different language.
-
1
2
3
4
5<field name="japaneseText" type="editor" class="inputbox"
label="COM_CONTENT_FIELD_ARTICLETEXT_LABEL" description="COM_CONTENT_FIELD_ARTICLETEXT_DESC"
filter="ContentHelper::filterText" buttons="true" /> - In the example above I am creating a field which I will use to put Japanese text
- 2. Now that we added the fields to our admin model, lets add it to the view so we can see it on our admin Interface. For this, go to administrator\components\com_content\views\article\tmpl\edit.php (we can use these folder and file names for an override)
- You can write changes here or override them while keeping the original. To do an override we use the same folder names but place them in our administrator template.
- You can find out which admin template you are using by logging in to your joomla website, and going into extensions > template manager.
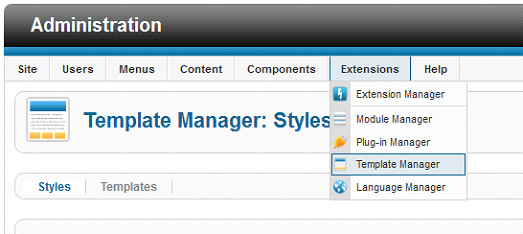
- Below the area on the above image, in the template manager screen you should see a list of all your templates, as well as an indicator for that which is being used as your administration template.
Overriding the template : Skip these steps if you will be making changes straight into the core components. Overriding, however is a much safer approach as you’ll keep your original should any changes arise.
* go to administrator\components\com_content\views\article\tmpl\edit.php and copy the edit.php file
*now go to administrator\templates\yourtemplate\html\
If the html folder indicated above does not exist then add it.
Also add the folders below if they are not there already
com_content\ article\edit.php (this is the php you copied from the components folder, and here you are overriding it. It’s the same as changing the original, but its good to keep the original intact in case the need to revert ever arises. )
- 3. Editing the Edit.php file
- In the edit.php file you will see these lines that output an input field called articletext.
-
1
2
3
4<div class="clr"></div>
<?php echo $this->form->getLabel('articletext'); ?>
<div class="clr"></div>
<?php echo $this->form->getInput('articletext'); ?> - If you look at the xml file in the first step you will see the field we copied had that same name. With that said you can also copy this same code, but instead of using articletext as the name, use the name of your new textbox.
-
1
2
3
4
5
6
7
8
9
10
11//Our new textbox
<div class="clr"></div>
<label>Article Text - Japanese Text</label>
<div class="clr"></div>
<?php echo $this->form->getInput('japaneseText'); ?>
//The default textbox
<div class="clr"></div>
<?php echo $this->form->getLabel('articletext'); ?>
<div class="clr"></div>
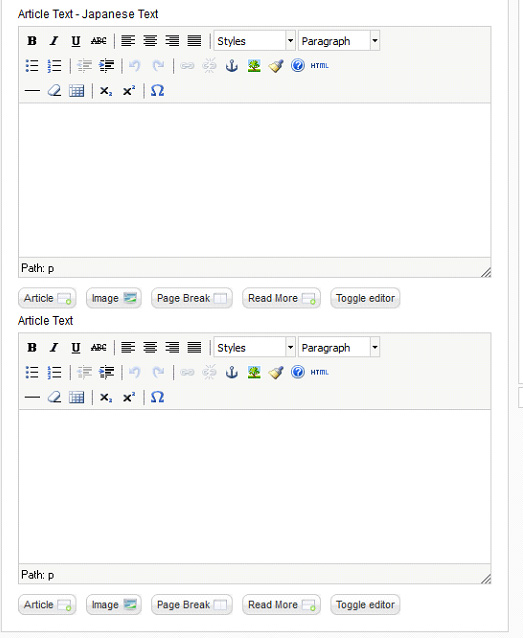
<?php echo $this->form->getInput('articletext'); ?> - I had called my textbox japaneseText, and you can see I copied the getInput code and used JapaneseText as the argument above. I am hardcoding the label in this case, as Article Text – Japanese Text
- Now we have a new textbox on the administration end. This is how it looks now when we go to add a new article.
- 4. Hooking up our new textbox with the database.
- Although the textbox now exists, it is not hooked up to the database. In your database, in your content table called yourPrefiX_content we need to add a new field with the same name you used for your textbox in the xml file (in my case japaneseText)
- You can add this new field through php my admin or using this command
-
1ALTER TABLE ` yourPrefiX_content ` ADD `japaneseText` VARCHAR( 255 ) NOT NULL;
- You may use mediumText instead of varchar(255)
- If the command executed successfuly our new input field should now be writing to our database.
So this is all for the admin end. Next post this week I will write part 2 of “Add custom content fields to Joomla.” In part 2 I will cover how to output these textfields in your website, as well as some tricks for Joomla using some of the techniques covered in the two articles.
Edits (Some comments include additions many may find helpful) Edited
Alex commented on how to display the custom fields in the frontend submission form
- To display the custom fields in frontend submission form, do these above edits (1 to 3) in
- /components/com_content/models/forms/article.xml
- components/com_content/views/form/tmpl/edit.php (you may want to copy this file to your template.
I look forward to reading any questions or suggestions you may have


Comments RSS and TrackBack Identifier URI ?
30 responsesDo you want to comment?
Trackbacks